If you would like to import many books at once, it’s best if you upload your files using our Bulk Import interface or SFTP server. You can also use Bulk Import to make changes to existing books in PublishDrive all at once.
The Bulk Import feature currently supports ebook and print books (audio is on the way). Follow the steps in the video, read the descriptions, and check out more details about Bulk Import below.
How to do it
1. Prepare your files
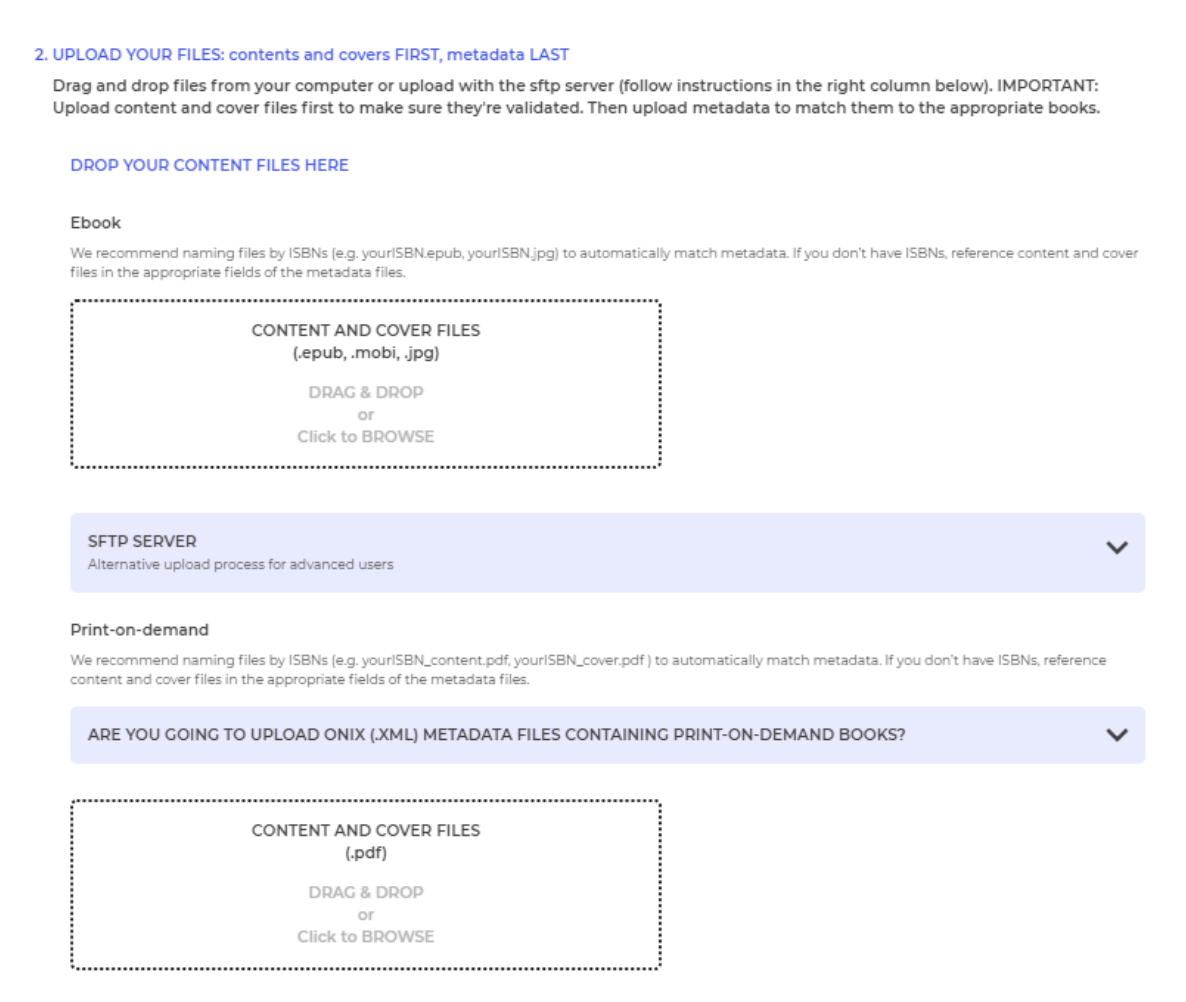
a) With ISBN: name your epub and cover files according to ISBN, for example, 987654321.epub and 987654321.jpg.
b) Without ISBN: name your epub and cover files according to the title, for example, title_subtitle.epub and title_subtitle.jpg.
MOBI files can be added as well as EPUB sample files (used for Amazon distribution).
-png.png)
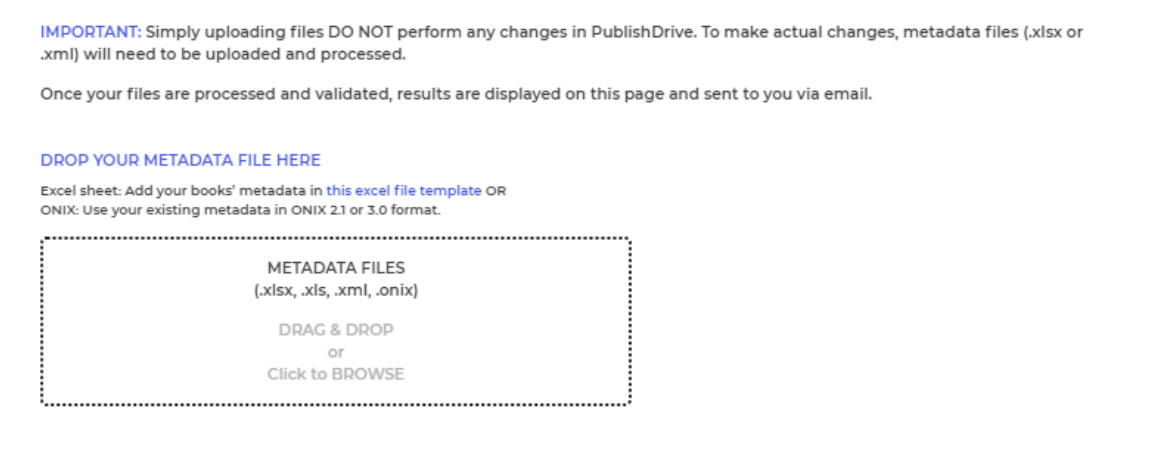
2. Prepare your metadata
a) Using our Excel sheet: download the Excel sheet template under Bulk Import from your dashboard. Fill in the Excel sheet with your data. Enter ISBNs or file names according to the instructions within the Excel file. (Note: The older Excel sheet version is still accepted.)
b) Using ONIX: prepare your ONIX 2.1 or 3.0 according to ONIX standards.
-png.png)
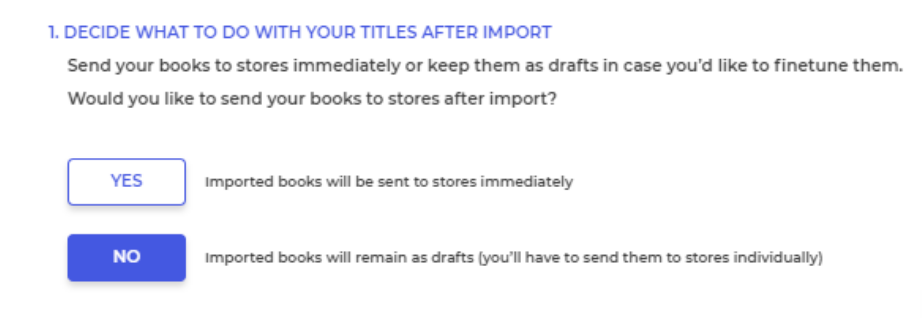
3. Decide what to do with your files
You can send them to stores immediately or keep them as drafts. Use the switch on the bulk import interface to set it up. This setting will be valid until you change it. You don't have to go back to the interface every time you import.
-png.png)
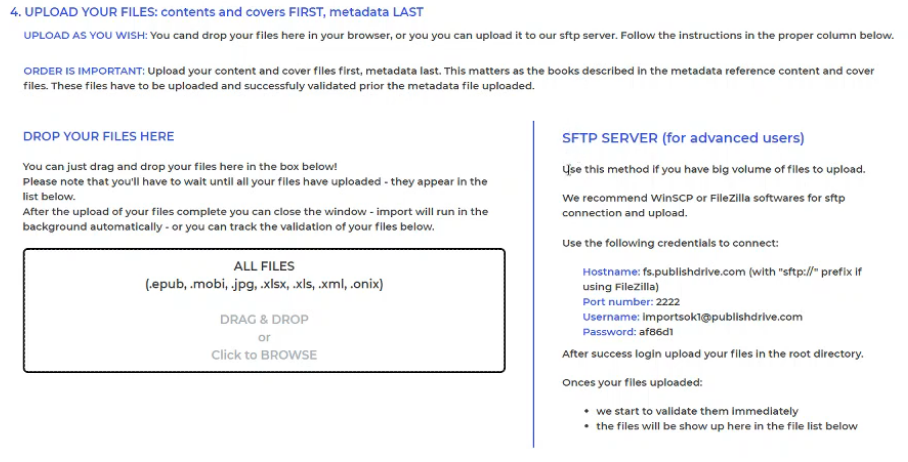
4. Upload your files and meta
a) Drag and drop them under Bulk Import. You'll have to wait until all your files have uploaded. Once everything has uploaded, you can close the window. We'll email you once your files have been processed.
b) Upload them to our sftp server. We recommend that you use WinSCP or FileZilla to upload files. You'll find your credentials on the Bulk Import page.
We'll email you once your files have been processed.
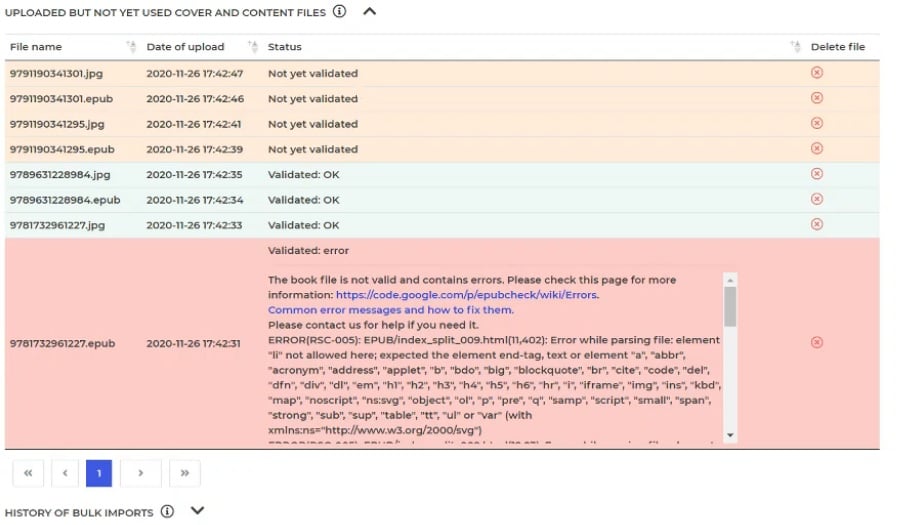
5. Check the status of your previous uploads
You can see two lists in this section, one contains 'Uploaded but not yet used cover and content files' and the other is the 'History of bulk imports'. The former shows your uploaded files that are not added as new books yet and the latter shows all previous uploads from your account and their results, possible validation errors and status. In case there are errors, you can directly download the error report and see the details under 'History'.

POD bulk upload (available for pro plan users)
Updating existing books in bulk
Any books with already existing ISBNs in PublishDrive can be updated by using the newest Excel template or ONIX file in Bulk Import.
- Include ISBNs to identify existing titles in PublishDrive.
- Fill out the fields in the Excel sheet (with ISBN identifiers) you want to update.
- Leave other fields empty to keep them as they are.
- Please check the import results carefully on the Bulk Import page or the email notifications sent out after each import.
About the newest Excel template (v3.3)
Download the newest Excel template from your PublishDrive dashboard by logging in. Changes made to the newest version includes:
- Updated, fixed field validations
- Updated help sheet with support links
- Updated BISAC sheet
- New sheet and column for adult content types
- More options to provide specific adult content types (e.g. incest, pseudo-incest, bestiality). See the complete list under “Adult content details” sheet in Excel v3.3.
- Add details under column W in Excel.
- A book can have more values, separated by commas (,).
- If a newly added field is mandatory, type “is explicit content” in column V.
- Latin transcripts accepted
- If a book contains non-Latin (Cyril, Chinese, Arabic, etc.) characters in the title, subtitle, or contributor data, then Latin transcripts should be added. That’s because some stores like Barnes & Noble can only process Latin transcripts for those specific metadata.
- If needed, add Latin transcripts under columns AK to AS in Excel.
- Sample files in EPUB formats (used for Amazon distribution) under columns AI and AJ in Excel sheet “PD import”.