![pd-white.png]](https://help.publishdrive.com/hs-fs/hubfs/pd-white.png?height=38&name=pd-white.png)
As an aggregator, PublishDrive helps you publish and distribute your book to all major online channels, including Amazon, Apple, Ingram, Barnes & Noble, and Google Play Books.
Unlike other stores, if you wish to self-publish on Google Play through PublishDrive, you need to consider the following:
- Direct Account Required: You must sign up directly with Google Play and obtain your own Google Play Publisher account. You can start this process within the PublishDrive platform, or link an existing account. [1, 2]
- Service Provider Assignment: If you want us to manage your catalog and royalties, you need to add PublishDrive as a service provider for your Google Play Publisher account
Here are the step-by-step instructions to get set up:
Step 1: Initiate the Setup & Check Country Restrictions
-
Log into your PublishDrive account.
-
Navigate to the Google Play account setup page located in the top right corner of your dashboard.
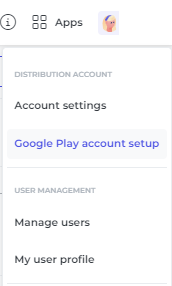
- An introductory pop-up window titled "Set up your Google Play connection" will appear.
- Review Country-Based Restrictions: Ensure Google Play supports publishing in your country. If Google Play is not supported in your location, your books cannot be sold.
- Click the blue "SET UP GOOGLE PLAY" button to enter the main configuration flow.
Step 2: Sign In or Create a Google Play Books Publisher Account
The first milestone on your left-hand sidebar is Set up Google account. Choose the path that applies to you:
- If you already have a Google Play Publisher account: Click the hyperlinked "log in" text inside the main instruction paragraph to connect it.
- If you do not have an account yet: Click the blue "SIGN UP" button inside the purple callout box to be redirected to the Google Play Partner Center.
- Note: On the Google Play sign-up screen, select either "publisher" or "self-published author" depending on your setup.
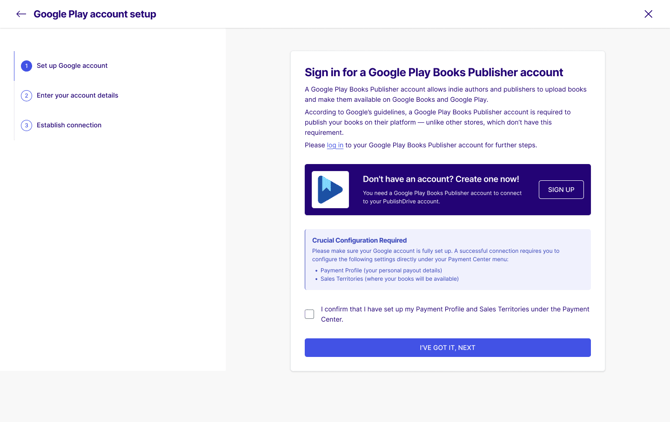
Alternatively, you can go to Google Play Books Partner Center and click on Get Started.
Note: This service is available to authors and publishers within certain countries. See the full list here.
When you arrive on the Partner Center sign-up screen, you will see this screen:
-png.png)
Select the option 'publisher' or 'self-published author', depending on which one fits you the most.
Next, PublishDrive monthly or annual subscription users have to add their financial information to get Google Play Books royalties directly.
-png.png)
Users in legacy plans like 'revenue share' or 'hybrid' will receive their royalties from PublishDrive, so if you have one of these plans, there is no need to add your payment profile.
You will also be prompted to upload your books, but you can skip this step if you are planning on adding us as your service provider since we will take care of uploading the books you have in your PublishDrive account.
Step 3: Fill out PublishDrive’s Internal Form
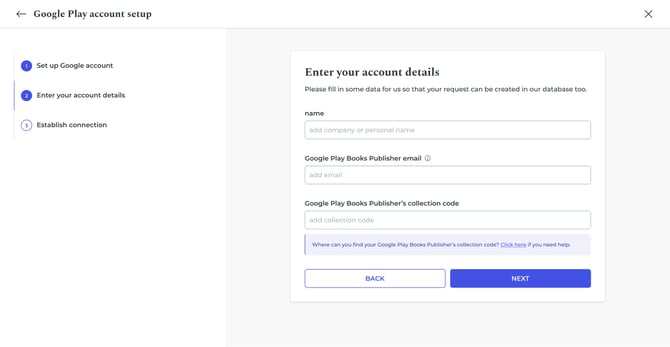
Once you register as a publisher in Google Play, return to the previous page (the Google Play set-up page in PublishDrive), and fill out the provided form using the same information you used when registering your Google Play account.
This will help us match your future Google Play Publisher account with your PublishDrive account.
Step 4: Make PublishDrive the Service Provider of the Account
Once you have a Google Play Books Partner account, you'll need to assign PublishDrive as the service provider of the account. This allows PublishDrive to handle all operational tasks on your behalf.
To do so, fill out this form.
To make sure the connection is successful, use the template below:
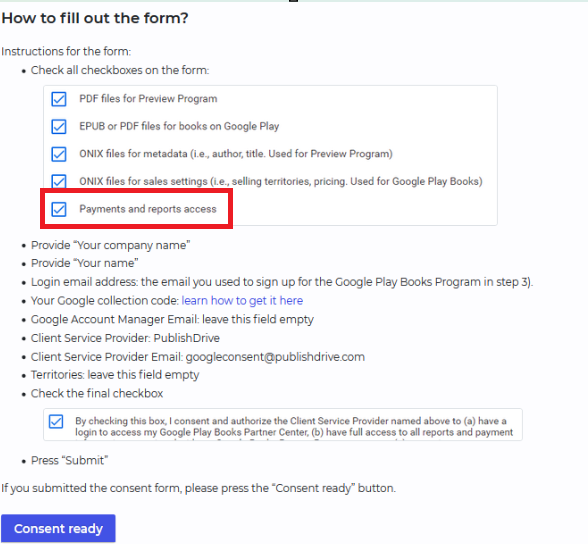
To receive your earnings, please add a sales territory to your account under "Payment center":
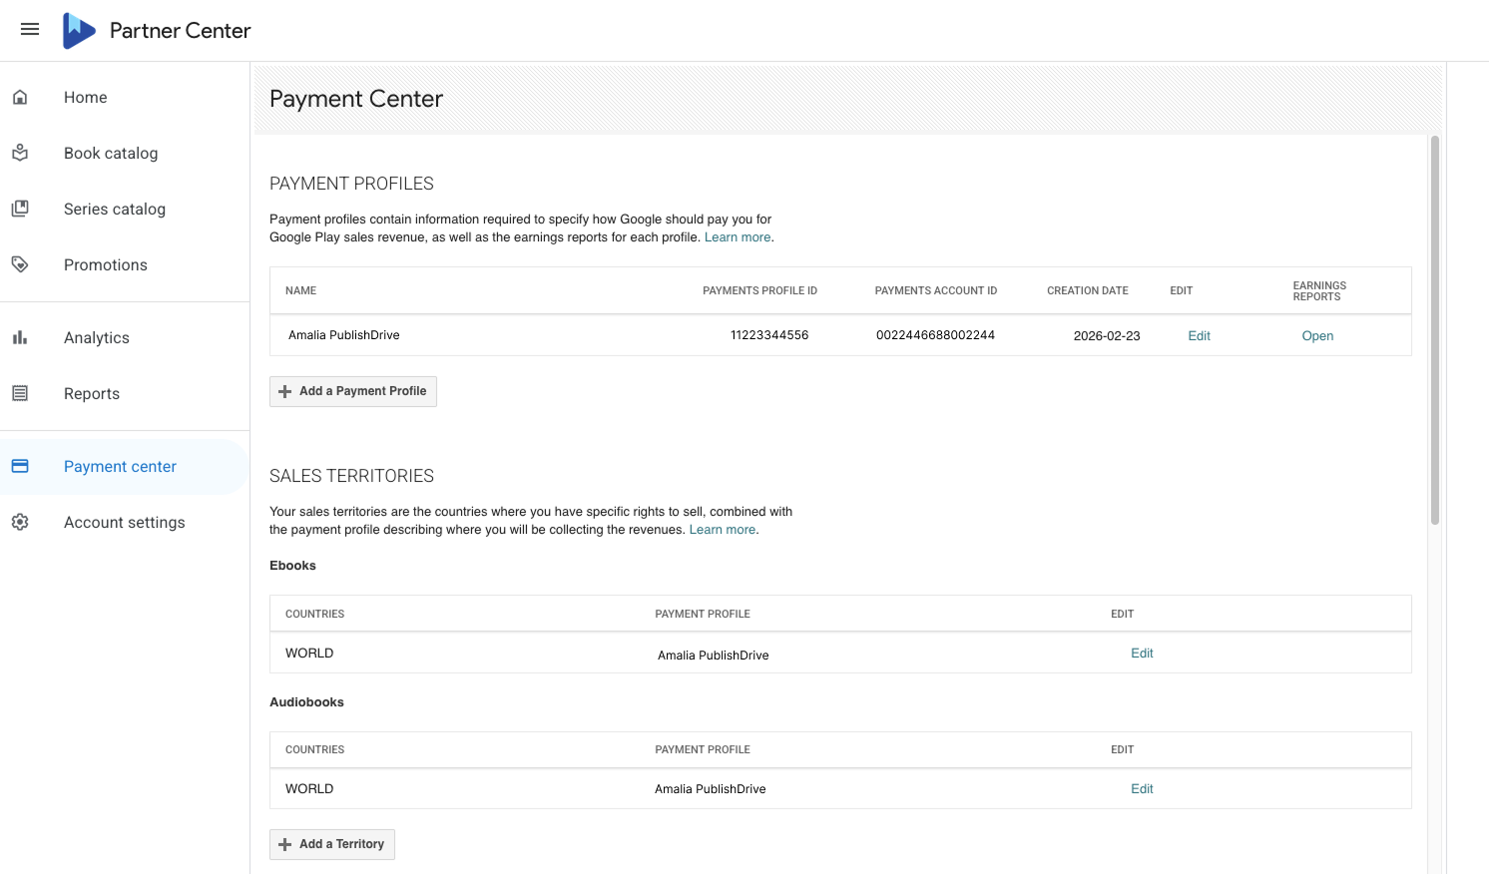
After you add all your information, your account is set up and ready to go.
After you add all your information, Google will notify us that you authorized PublishDrive to handle the account on your behalf. We'll manage distribution, payout, and all other operational tasks from this point on.
Step 5: Upload your book
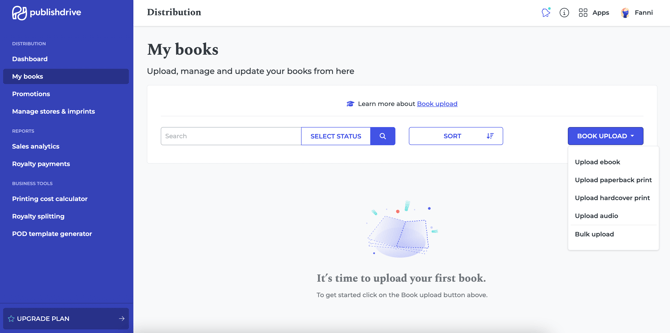
Go to My Books from PublishDrive’s dashboard and click on Upload Book > Ebook.
Step 6: Set up all the necessary information
In this step, you'll upload your content file and cover image and set all the other details, such as creators, metadata, categories, price, rights, and distribution stores.
-png.png?width=528&height=472&name=unnamed%20(20)-png.png)