If you need to adjust audio files to meet the following specifications:
• 192kbps CBR stereo MP3
• Overall Peak Level ≤ -3.0 dB
• Overall RMS Level between -23.0 dB and -18.0 dB,
Step 1: Prepare Your File in Audacity
-
Open Audacity: Download and install Audacity if you haven’t already (Audacity Download Page).
-
Import Your Audio File:
-
Go to File > Import > Audio or simply drag and drop your file into the Audacity window.
-
-
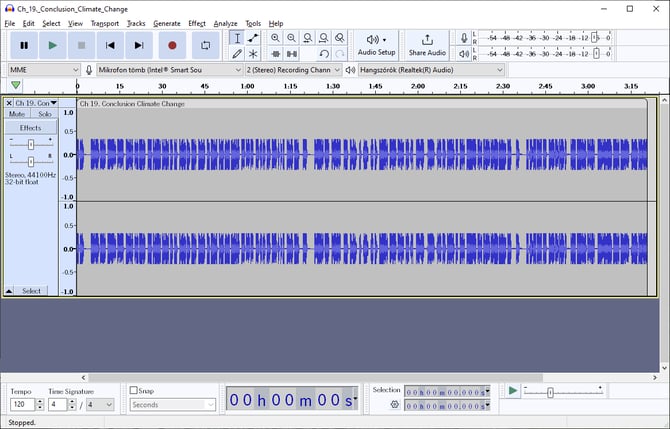
Ensure Stereo Format:
-
Check the track header on the left side. If it says “Mono,” convert the track to stereo by going to Tracks > Mix > Mix and Render to New Track. ( if you can see one sound wave the file is Mono, if two, the file is Stereo)
-
Mono:

Stereo:
Step 2: Adjust Peak Levels
To ensure the overall peak level is ≤ -3.0 dB:
-
Select the Entire Track:
-
Use Ctrl+A (Windows) or Command+A (Mac).
-
-
Open the Amplify Tool:
-
Navigate to Effect >Volume and Compression > Amplify.
-
-
Set Peak to -3.0 dB:
-
In the dialogue box, look at the “New Peak Amplitude” field. Set it to -3.0 dB.
-
Audacity will automatically calculate the necessary amplification.
-
If the audio peaks above -3.0 dB, this adjustment will reduce the levels. Click OK to apply the change.
-

Step 3: Adjust RMS Levels
To meet the requirement of RMS levels between -23.0 dB and -18.0 dB:
-
Install the Loudness Normalization Plugin (if needed):
-
Audacity comes with the Loudness Normalization tool. If it’s missing, download and install the Nyquist plugins from the Audacity website.
-
-
Apply Loudness Normalization:
-
Go to Effect > Volume and Compression > Loudness Normalization.
-
Select RMS as the normalization method.
-
Set the Target RMS Level to a value within the specified range, e.g., -20.0 dB (a midpoint between -23.0 dB and -18.0 dB).
-
Click OK to apply the effect.
-
-
Verify RMS Levels:
-
Use the Measure RMS tool or a plugin like ReplayGain to confirm the adjusted RMS level.
-

Step 4: Export as 192kbps CBR Stereo MP3
-
Open Export Settings:
-
Go to File > Export as Audio
-
-
Configure MP3 Settings:
-
In the Export dialog box:
-
Set the Bit Rate Mode to Constant.
-
Set the Quality to 192 kbps.
-
Ensure the Channel Mode is set to Stereo.
-
-
-
Save the File:
-
Choose a location and click Save.
-

Step 5: Final Quality Check
-
Confirm Peak Levels:
-
Use View > Show Clipping in Waweform to ensure no parts of the audio exceed the -3.0 dB threshold.
-
-
Double-Check RMS Levels:
-
Use an external tool like Audacity’s ReplayGain to verify RMS levels are within the specified range.
-
Tips for Best Results
-
Avoid Excessive Compression: Over-compression to adjust RMS levels can reduce audio quality. Apply adjustments incrementally.
-
Check for Clipping: Always monitor for clipping after applying effects.
-
Backup Original Files: Save a copy of your unedited audio file before making changes.
By following these steps, you’ll ensure your audio files meet the required parameters and maintain optimal quality.