Please follow these steps to learn how to format a manuscript for ebook conversion.
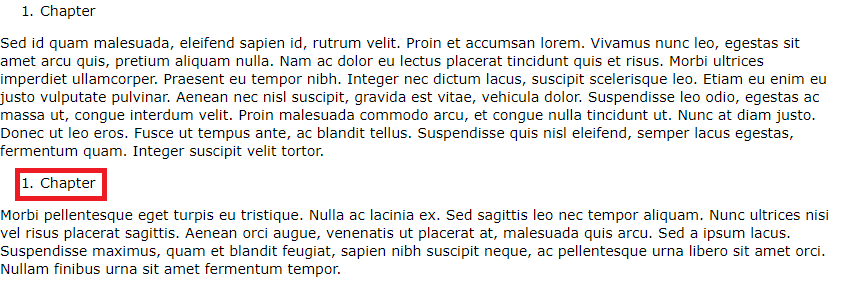
1. Remove all formatting
For the stylesheet to work properly and your book’s formatting to be consistent, you will have to format using general styles instead of using local formatting. Styles format texts on the level of a paragraph.
(A paragraph is a text between 2 forced line breaks: your chapter titles are paragraphs as well.)
To start with a clean slate, it is best if you remove all formatting. Yes, this will hurt a lot.
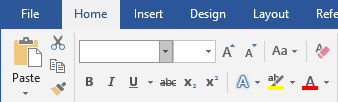
In Google Docs, press CTRL+A to select the whole document, then go to the styles (it should be somewhere at the top) and select Normal. In Word, click the Clear all formatting button to remove all formatting.
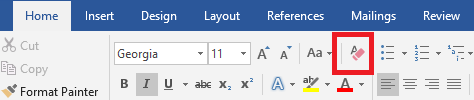
Please note, that this will remove all formatting, including italics and bold. To keep italics and bold, press CTRL+A to select the whole document, then go to the styles, and select Normal. If you have all text selected but your Font and Font size fields are blank, it means that there is still some local formatting left somewhere.
To solve this, just select a simple, common font like Arial or Garamond and 12pt size. This is not the final formatting of your book: we will add the formatting back again later.
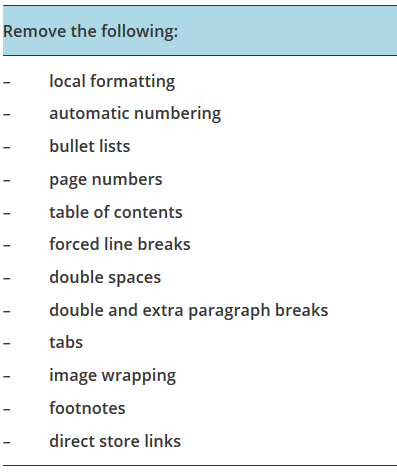
2. Remove the following
Before we add the formatting back again, let’s clean the manuscript properly. We have to remove everything unnecessary.
Automatic numbering
I’m sorry, but you’ll have to switch it off. Numbered lists can work, if your items are immediately one after the other, like this:
- item
- item
- item
On the other hand, current epub standards are unable to handle numbered lists if you are “breaking” the list somewhere then trying to continue it. This happens if you add extra blank lines or extra text between two items.
For example, what looks like this on your screen:

Will most likely look like this on the ebook reader:
To switch off numbering, click the little numbers sign:
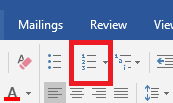
You’ll then have to enter your numbers manually. If your book contains many instances of automatic numbering and you would like to convert them all to “real” numbers, here is a trick you can try.
Automatic bullet lists for dialogs
Automatic lists are often present for dialogs, as in many languages dialogs are signaled with a dash, and not with a quotation mark. Unfortunately, the length of the “bullet” and the length of the dash are not the same. Additionally, styles for bulleted lists are often predefined on ebook readers, and they often receive different formatting, making your book look silly. If you are using bulleted lists for your dialogs, use the trick mentioned in the previous paragraph.
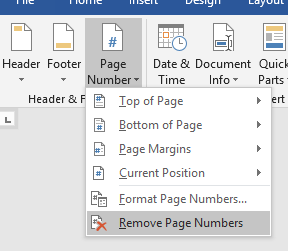
Page numbers
Delete any page numbers from the footers and headings. To do so in Word, double click the top or bottom of the page to open the Headers and Footers menu, and click Remove Page Numbers.
You should also delete any references of page numbers (e.g., don’t say: see it on page 20, say something like see it in Chapter 1). You can easily do so by pressing CTRL+F and search for “page”.
Table of Contents
While every book should have a Table of Contents, the one you insert at the beginning of your document, won’t work. It either loses its ability to be clickable, or it keeps the page numbers: page numbering does not make any sense when it comes to an ebook. Therefore, we suggest to remove the Table of Contents.
To remove your Table of Contents, click References, then select Table of Contents on the left, and click Remove at the bottom. Don’t worry: we will make a new Table of contents during conversion.
If you want to keep your Table of contents, please generate your own. For this, go to References Table of contents and choose Automatic table 1 or 2. If you make changes to your document that affect the table of contents, update the table of contents by right-clicking the table of contents and choosing Update Field.
Forced line breaks
If you have ever solved the problem of orphans and widows with a soft or hard line break, think again. Select the little paragraph icon (❡) on the Home tab in Word to show all non-printing characters. This will display all “invisible” formatting signs. Your text will look somewhat like this:
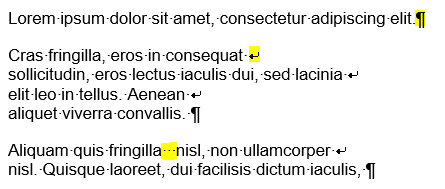
You will see a ❡ for every hard break (paragraph break) and a ⮐ (soft return) sign for every soft line break. The little dots stand for space.
Make sure that you only have paragraph breaks ❡ at the end of paragraphs, and nowhere else. You cannot have paragraph breaks in the middle of a sentence.
If you leave in the forced line breaks in the middle of the sentence, you end up with this:
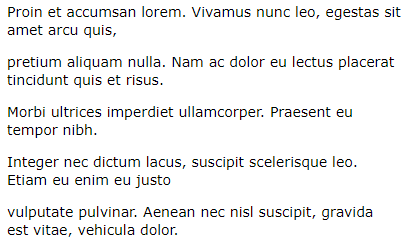
If you see any paragraph break or soft return that should not be there, simply delete it.
Double spaces
Go to Find and replace and replace all your accidental double spaces with one space. To do so, press CTRL+H, and press the Space twice ( ) in the Find field. Then go to the Replace field, and press the space only once ( ).
Double paragraph breaks
Do not manually add extra breaks between paragraphs. At the end of the paragraph, it is enough to hit Return only once; if you need some space between the paragraphs, we can add that later using styles. If you are signaling a substantial break within a chapter (a section or scene break, to give the reader some time to breathe), please insert one line with three asterisks, like on the following picture:
-png.png)
Start your chapters on new pages
While it is common to start a chapter on a new page, do not add more paragraph breaks to make something go to the next page. Since your book will be read on devices of many different types and sizes, it will simply mess up your layout.
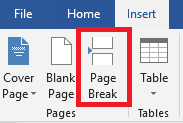
Use CTRL+Return to insert a page break before chapters to get your chapters start at an empty page. You can also use the Insert Page Break function.
Tabs
Do not use tabs for aligning paragraphs. Remove them all for now: we’ll add some indents later. Press the ❡ sign to show all hidden characters. A little arrow stands for tabulators, like on the picture below:
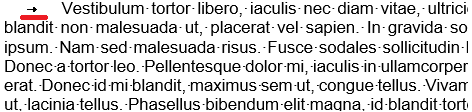
There is no need to set the indents now: we’ll set them later as styles. Just remove the tabs.
Image wrapping
Images are best inserted between two paragraphs on a separate line, with the image wrapping off. To set this in Word, click on your image, click Layout Options in the top right corner, and select In Line With Text. You can also find this option in the Format menu, like in the picture below. This will ensure that your images are “anchored” to the correct place, so they will remain between these two paragraphs even after the conversion.

While it is possible to wrap images in epubs, beginners are not advised to experiment with this setting, as it usually results in bad formatting.
As part of your preparation, make sure that none of the images are larger than 4 megapixels (4 million pixels); and, of course, are of a good quality and not pixelated. In case of an ebook (usually viewed from a smartphone or tablet), 4 million pixels are enough to provide good quality without unnecessarily increasing the size of the book. Keeping the ebook size low is common courtesy as most of your readers will encounter the book on a device with limited storage capacities.
Please note that if your images are not originally rotated the way you would like to use them, the rotation should be performed in your operating system (for example, right click on the file, 'Rotate...' in Windows systems) and not in Word. The conversion process will always use the original source file that you insert into your manuscript, so it is important to rotate it properly before the insertion.
Footnotes
Convert your footnotes into endnotes. Many ebook conversion tools would do this automatically, but it’s best for you to do it yourself. You can decide to place them at the end of the book or at the end of each chapter. Here is a detailed guide on how to do this.
Direct store links
Your books can have links directing to your own website, social media or your Goodreads profile. However, ebook stores do not allow any links directing to competitors’ sites. (Links to other stores.) Additionally, please do not insert anything like ‘buy it on Amazon.com’ or ‘review it on Google Books’. Use expressions like ‘Review the book in the store where you bought it.’
3. Add formatting back again
Once your text is clean, you can add the formatting back again using styles.
Body
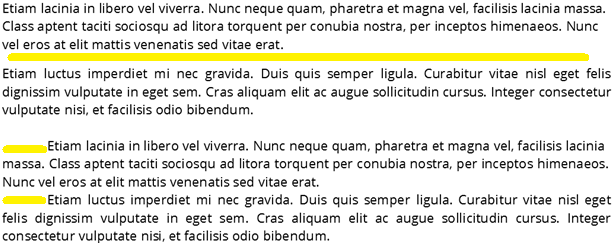
The body of your book is already styled as “Normal”. You can format your normal paragraph as you wish (including typefaces, sizes, etc.), but the most important decision you should make is whether you are using indents or spaces to separate your paragraphs. It is entirely up to you, but please don’t use both.
If you are using indents, don’t simply insert a tab in front of a paragraph (remember, we just removed those?) but use the ruler at the top.

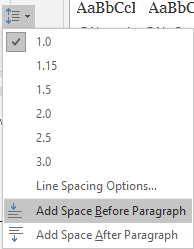
If you are using spaces, use the Add space before / after paragraph option. (Whichever makes more sense for you.)
The following picture shows the difference between the two styles.
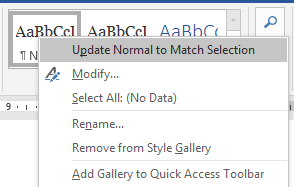
Once you’ve decided how your paragraph is going to look like, right click “Normal”, and select Update Normal to Match Selection. This will format all your normal paragraphs the same way.
If you would like the first paragraph in each chapter look differently, apply your changes at the first paragraph, then select Create a style. Name your style something you would remember, for example “Firstparagraph”.

Headings
It is crucial for your headings (chapter titles and subtitles) to be marked as headings, otherwise the conversion software won’t recognize them and won’t use them to create the table of contents. Just click at your first chapter title and select “Heading 1” under your styles.

Now, you can do all the formatting you wish, just don’t forget to update the style once you are done.
You just simply have to repeat this for all of your chapters and subchapters. It is enough only to select Heading 1: the formatting will automatically apply.
Title Page
Use Title and Subtitle or simple Paragraph styles for customize your title page. Please do not use too many force line breaks/empty lines, only maximum 3.
Add front matter and end matter
Well done, your book manuscript is now formatted properly! Your next task is to turn it into a book. I would suggest that you Save as now and start working on a new file.
While your book manuscript can begin with the first chapter, your book can’t. You’ll need a cover, a title page, copyright page, and table of contents. At the end of the book, many people consider adding an Author bio and an Other books from the same author section.
Of these things, we only add the title page (title and the author’s name), the copyright page, and the back matter. Don’t add the table of contents or the cover now.
Other
Add your Title to the docx file in Word. For this, choose File -> Info -> Properties ->Title -> Add a title option.
Save as and convert
Once your ebook manuscript is ready, save your file in a .docx format, then simply upload it to PublishDrive! We’ll do everything else.